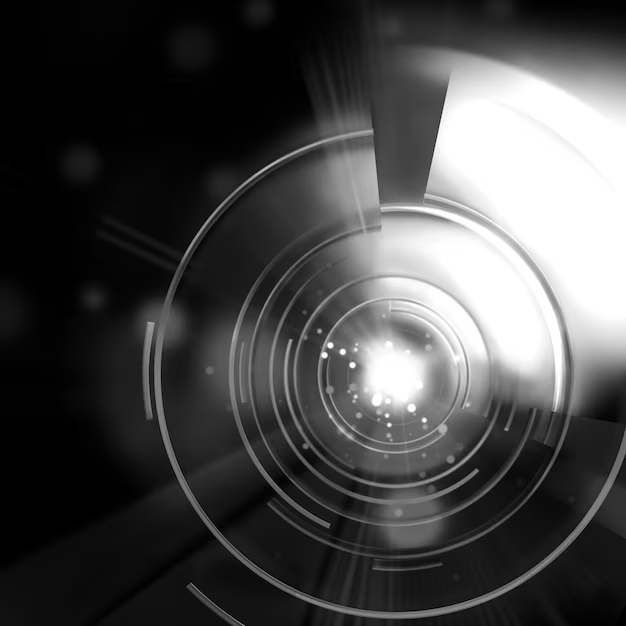
Let’s be honest. We’ve all been there. You see an amazing photo online with this gorgeous, sun-kissed lens flare. It feels warm and magical. Then you try to capture it with your own camera or phone… and you get a weird blob of light that ruins the shot. Frustrating, right?
For years, I thought getting that perfect streak of light was just luck. Or that you needed a thousand-dollar lens. Then I found Photeeq. Specifically, the Photeeq Lens Flare tool. It changed everything for me. This isn’t about fake-looking filters. It’s about adding realistic, beautiful light after you take the picture. And I’m going to show you exactly how to do it.
What is Photeeq, Anyway?
In simple terms, Photeeq is a powerful photo editing app. It’s packed with tools that help you tweak colors, fix shadows, and yes—add amazing light effects. Think of it like a Swiss Army knife for your photos. The lens flare feature is one of its standout tools.
It lets you put a believable light source anywhere in your image. You control the size, the color, the intensity, and even the angle of the light rays. This means you’re not stuck with what you captured. You can create the mood you wanted to capture. For more on starting with the app, check out our [Photeeq beginner’s guide].
Why Fake a Lens Flare? (And When to Do It)
I know, I know. “But isn’t that cheating?” Here’s my take: editing is part of photography. Always has been. A lens flare in editing is like adding a spice to a meal. It enhances what’s already there.
Use it to:
Save a dull, flat photo by adding a focal point.
Emphasize a light source, like making a sunset pop.
Create a vintage or dreamy feel in portraits.
Hide a boring patch in your composition.
The key is subtlety. The best edits are the ones no one notices as edits. They just feel right.
My Simple Photeeq Lens Flare Workflow
Here’s how I use the tool, step by step. I promise it’s easier than it sounds.
Pick the Right Photo. Start with an image that already has a logical light source. A window, a streetlamp, or the sun just out of frame. This makes the flare look natural. A dark, moody shot often works great.
Find the Tool. Open your photo in Photeeq. Look for the “Lens Flare” option. It’s usually with the effects or light tools.
Place and Adjust. Tap where you want the flare’s center. Now, play with the sliders:
Intensity/Opacity: Start low! I often keep this between 20-40%.
Size: Match it to your scene. A huge flare in a small room looks odd.
Color: Tap the color picker. Match it to the existing light in your photo for realism.
Angle/Rotation: Turn the rays so they align with your light source’s direction.
Blend It In. This is the magic step. Use the “Blend” or “Soften” slider if there is one. Or, go back to your main editing tools. A tiny boost in warmth or a slight vignette can help the flare feel like it belongs.
A Quick Personal Story
Last summer, I took a photo of my dog in our very ordinary backyard during golden hour. The light was nice, but the photo felt… flat. On a whim, I used Photeeq to add a small, warm lens flare right where the sun would be hitting the fence behind him. Suddenly, the whole image had a storybook feel. That one tiny change turned a snapshot into my favorite picture of him. It proved to me that this tool isn’t for fixing mistakes—it’s for creating moments.
Pro Tips to Avoid That “Fake” Look
Less is More. Seriously, dial it back. A hint of glow is often enough.
Mind the Light Source. Your added flare should cast a very subtle glow on nearby objects. Sometimes, I use a separate, soft brush to paint a tiny bit of that flare’s color onto a person’s hair or shoulder.
Quality Matters. The tool works best on high-resolution images. A blurry, pixelated photo will only look worse with an effect on top.
Study Real Flares. Look at professional photos you admire. Notice where the light streaks are, how they interact with objects, and their color. Resources like [Digital Photography School’s guide to lens flare] are great for learning the real thing first.
Wrapping It Up
Mastering the Photeeq Lens Flare tool is all about practice and a gentle hand. It’s a powerful way to add emotion, depth, and that “wow” factor to your photos long after you’ve put your camera down. Remember, you’re not just adding light; you’re guiding the viewer’s eye and creating a feeling.
So, grab a photo that didn’t quite turn out how you hoped and give it a try. Start subtle. Play with the sliders. You might be surprised at what you can create.
Did you try this guide? I’d love to see your before-and-afters! Share your results in the comments below, or tag me on social media. And if you’re into color editing too, don’t miss our post on [mastering color grading in Photeeq].